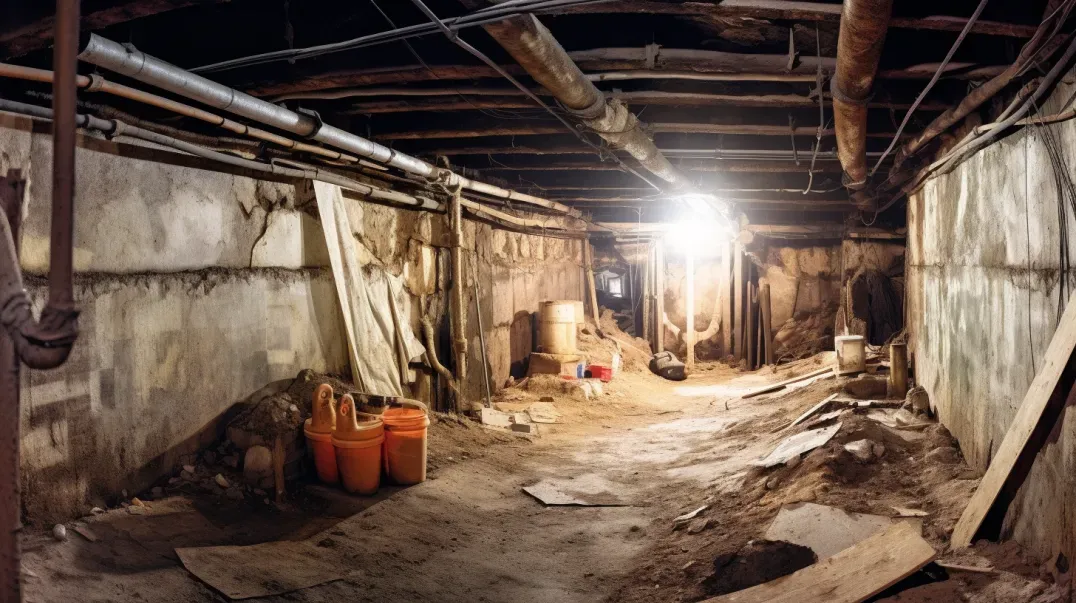
Every home relies on a network of structural components to stay strong and stable, and at the heart of this network are the joists. Joists form the essential framework that supports the weight of your floors, walls, and ceilings, ensuring the even distribution of loads across the structure. Although they often go unnoticed, these horizontal beams provide the backbone that keeps your home standing firm.
However, without proper maintenance and protection, joists can quickly become compromised by moisture, pests, or physical damage, putting your entire home at risk. A single weak or damaged joist can lead to sagging floors, cracked walls, and ultimately compromise your home’s safety. Recognizing the importance of joists is crucial for understanding the overall health of your structure and ensuring timely repairs when needed.
In this blog, we’ll delve deeper into the significance of joists in maintaining structural integrity, exploring their role in different parts of the home and highlighting the common issues that can weaken them over time. By understanding the critical role joists play, you can better protect your home’s foundation and structural stability, giving you peace of mind and a secure living environment.
Preparing for the Replacement
Replacing joists in a crawl space requires careful preparation to ensure the process is safe and effective. From safeguarding yourself against potential hazards to gathering the right tools and materials, here are some key considerations to prepare thoroughly.
Safety Considerations
Importance of Personal Protective Equipment (PPE)
Working in a crawl space is often a confined and challenging environment. Personal protective equipment is crucial for minimizing risks:
- Gloves: Heavy-duty work gloves protect your hands from sharp edges, rough surfaces, and potential splinters while handling old or new joists.
- Masks: Dust masks or respirators are necessary to prevent inhaling dust, mold spores, and other airborne particles that are common in crawl spaces.
- Safety Goggles: Protect your eyes from dust, debris, and accidental tool contact while cutting or handling materials.
Ventilation and Hazard Management
- Proper Ventilation: Ensure the crawl space is well-ventilated to reduce exposure to dust, mold spores, and chemical fumes from adhesives and treatments.
- Pest Inspection: Check the area for signs of hazardous pests, such as rodents or termites. If present, seek professional pest control services to remove them before starting work.
- Mold and Mildew Removal: Inspect for mold and mildew growth on old joists and remove them with appropriate treatments, as they can cause respiratory issues and further wood decay.
Gathering Necessary Tools and Materials
Tools for Joist Replacement
- Saws: Circular saws or reciprocating saws are necessary to cut through old or damaged joists.
- Drills: Electric drills help create pilot holes for screws or bolts.
- Pry Bars: Pry bars assist in removing old joists without damaging surrounding structures.
- Measuring Tape and Levels: Measure accurately and ensure proper alignment and leveling of the new joists.
Materials for Joist Replacement
- New Joists: Choose replacement joists based on load-bearing requirements, the dimensions of the existing joists, and local building codes. Engineered wood joists or pressure-treated lumber are common choices for high strength and resistance to pests and moisture.
- Nails, Screws, and Adhesive: Ensure you have the correct fasteners and adhesive recommended for securing the new joists. Construction adhesive can add extra strength and prevent squeaking.
- Joist Hangers and Brackets: Install these to anchor the new joists securely to the supporting beams or walls.
- Moisture Barriers: Adding moisture barriers or insulation between the crawl space floor and joists can help prevent future decay and maintain the new joists' longevity.
By taking these safety precautions and assembling the right tools and materials, you can approach the joist replacement project confidently and effectively. Proper preparation ensures that the replacement process will not only be safer but also yield a long-lasting and structurally sound result.
Inspecting the Damage
Thoroughly inspecting the extent of damage in a crawl space is crucial before planning any joist replacements. This inspection helps you identify the scope of the repairs required and uncover other potential structural issues that may need immediate attention. Here’s how to identify rot and assess additional structural risks.
Identifying Rot in Joists
Rot is one of the most common and damaging problems affecting joists. It’s essential to detect it early to prevent further structural compromise. Look for these key signs:
- Discoloration: Rot often appears as dark or light discoloration on the wood's surface. This discoloration may look darker in damp conditions and lighter when dry.
- Crumbling Wood: When wood has decayed significantly, it may crumble or break off easily. This happens because the structural fibers have been weakened or destroyed.
- Musty Odor: Rot is often accompanied by a damp, musty smell that suggests fungal growth within the wood.
- Softness or Sponginess: Use a screwdriver or awl to gently prod the joist. If the wood is soft, spongy, or flakes away easily, it’s likely affected by rot.
Assessing the Extent of Rot
After identifying rot in one or more joists, you must determine how widespread the problem is.
- Examine Neighboring Joists: Check adjacent joists for signs of decay, especially if they are close to the affected area. Rot often spreads across multiple beams due to consistent moisture exposure.
- Measure Depth of Decay: Probe each affected joist to estimate how deeply the rot has penetrated. If the rot is deep, the joist likely needs full replacement.
- Mark and List: Clearly mark the affected joists and make a list of those needing replacement or reinforcement. This list will guide your repair work and ensure no compromised joist is missed.
Assessing Additional Structural Risks
The presence of rot in joists may indicate further issues with the surrounding structure. Carefully inspect other areas to ensure that your repair plan addresses all vulnerabilities:
- Check Nearby Joists and Subflooring: Inspect neighboring joists for early signs of hidden rot. Examine the subfloor above the affected area for any soft spots, mold, or buckling that may suggest damage.
- Support Beams and Posts: Test the primary support beams and posts that hold up the joists. Use a screwdriver or hammer to detect soft spots that might indicate decay.
- Footings: Examine the concrete footings supporting posts and beams for cracks or signs of settling, which can compromise stability and increase the risk of further structural damage.
- Additional Moisture Sources: Determine if there are any leaks, standing water, or drainage issues contributing to the rot. Fixing these issues is crucial to preventing recurrence.
A comprehensive inspection of the crawl space ensures you have a complete understanding of the damage and the scope of repairs needed. This inspection helps develop a targeted repair plan that addresses all affected components, ensuring the long-term stability of your home’s structure.
Removing Rotten Joists
Removing rotten joists requires careful preparation to prevent further damage to the surrounding structure. Setting up temporary supports and safely detaching the old joists are essential steps to ensure a smooth and secure replacement process.
Creating a Support Structure
Temporary supports are necessary to stabilize the flooring and nearby joists while the damaged ones are being removed. Here’s how to create a safe and reliable support structure:
- Materials Needed:
- Heavy-duty wooden beams (2x4 or 4x4)
- Screw jacks or hydraulic jacks
- Adjustable steel posts
- Plywood sheets
- Instructions:
- Assess Load Requirements: Determine the weight of the floor and other structures supported by the joists to be replaced. This will help you gauge the number of jacks and supports required.
- Position Temporary Beams: Place heavy-duty wooden beams perpendicular to the existing joists, close to the damaged areas. Lay plywood sheets underneath the beams to distribute the load across the floor.
- Install Screw Jacks or Hydraulic Jacks: Place screw or hydraulic jacks beneath the beams to elevate them slightly, just enough to relieve pressure from the rotten joists. Avoid lifting too high to prevent damaging the surrounding structure.
- Secure Adjustable Posts: Once the temporary beams are raised to the desired height, secure adjustable steel posts underneath to hold the beams steadily in place. Tighten each post securely to prevent movement.
- Check Stability: Test the temporary support structure by gently pressing on the floor above. Ensure there is no significant movement or sagging.
Detaching Rotten Joists
After establishing temporary supports, it’s time to carefully detach and remove the rotten joists. Follow these steps to ensure safe removal:
- Tools Needed:
- Circular saw or reciprocating saw
- Pry bar
- Hammer
- Drill
- Step-by-Step Guide:
- Mark and Plan: Mark the areas where the joists need to be cut, ensuring the cut is made beyond the rotten section if only part of the joist is damaged.
- Cut the Joist: Use a circular saw or reciprocating saw to carefully cut the joist at the marked points. Make sure the cuts are clean and straight. If the entire joist is being replaced, cut at the ends where it connects to the beams.
- Detach Fasteners: Remove nails or screws securing the joist to its supports using a drill or pry bar. If fasteners are corroded or difficult to remove, carefully break them away with a hammer.
- Gently Pry Loose: Once the joist is free from the fasteners, gently pry it loose from its position. Be mindful not to damage adjacent structures or knock out additional fasteners.
- Remove the Joist: Pull the detached joist out of the crawl space carefully. If it is too heavy or cumbersome to move in one piece, consider cutting it into smaller sections.
- Inspect Adjacent Structures: Before installing a new joist, inspect nearby beams, subflooring, and joist hangers for any signs of damage that might require repair.
Taking these steps ensures that the damaged joists are safely removed and the surrounding structure remains intact. Proper support structures and careful removal methods are crucial in preventing sagging and other issues that could compromise your home’s structural integrity.
Installing Replacement Joists
Proper installation of replacement joists is essential for restoring the structural integrity of your home. By carefully measuring and cutting new joists and securing them with the appropriate fasteners, you can ensure a stable and secure flooring system that will last for years.
Measuring and Cutting New Joists
Accurate measurements and cuts are critical to fitting new joists into the existing layout. Follow these guidelines for precise measurements and treatment:
- Measure the Space Accurately:
- Use a measuring tape to measure the span between the beams or supports where the new joist will rest.
- If replacing an entire row of joists, measure each section individually since not all joist bays may be identical.
- Account for the thickness of the supports and any joist hangers to ensure the new joist will fit securely.
- Mark and Cut:
- Mark the measured length clearly on the new joist, ensuring your cuts will be clean and straight.
- Use a circular saw or miter saw to make the cuts at the marked points.
- Double-check each cut piece by fitting it in place to ensure proper alignment.
- Treat for Moisture Resistance:
- Apply a high-quality wood preservative or sealer to the cut ends and surfaces of the new joist. This treatment will protect against moisture and fungal decay in the crawl space environment.
- Allow the treated joist to dry completely before installation.
Securing New Joists
After cutting and treating the new joists, securely install them to prevent shifting or sagging. Here’s how:
- Positioning the Joist:
- Carefully place the new joist into its final position, ensuring it aligns perfectly with the existing layout.
- Support the joist with temporary blocks or clamps to hold it steady while fastening.
- Fastening with Nails or Screws:
- Use galvanized nails or screws to attach the new joist to the supports. Galvanized fasteners are resistant to corrosion and will remain secure in damp conditions.
- Ensure each nail or screw is driven in firmly and that all fasteners are evenly spaced.
- Installing Joist Hangers:
- Where possible, use metal joist hangers to provide additional support. Attach the hangers to the beam or wall and then to the joist.
- Secure the hangers with nails or screws specifically designed for joist hangers, ensuring a strong connection.
- Apply Construction Adhesive:
- Apply a construction adhesive along the surfaces where the joist will contact the beams or subfloor. This adhesive will provide additional strength and prevent future squeaking.
- Final Checks:
- Inspect each joist for stability after securing it in place.
- Check for proper alignment, level, and spacing to ensure the joists are evenly positioned and securely fastened.
Following these steps ensures that the new joists are installed securely, providing the necessary support to restore and maintain the structural integrity of your flooring system.
Testing and Cleanup
After installing the replacement joists, testing their stability and thoroughly cleaning the workspace are crucial final steps. These ensure the structural integrity of your home and prevent future issues like moisture accumulation or joist rot.
Testing Structural Stability
To ensure the new joists can safely bear the expected load, follow these steps to assess their stability:
- Visual Inspection:
- Carefully inspect each joist to ensure it is properly aligned and securely fastened to the beams, walls, or subfloor.
- Check that the joist hangers are tightly secured and that no fasteners are loose or missing.
- Load Testing:
- Gradually add weight to the flooring above the new joists, starting with light loads and increasing gradually to simulate the expected everyday load.
- Walk along the floor above to feel for any excessive bounce or flexing, which could indicate instability or loose connections.
- Subfloor and Connections Check:
- Inspect the subflooring above the joists for any soft spots, sagging, or cracking, which might signal weak points or inadequate fastening.
- Check the connections between the joists and beams to ensure there are no gaps or signs of shifting.
- Measure Deflection:
- Use a measuring tape or straight edge to measure the deflection of the joists under load. Compare this to the acceptable deflection specified by building codes to confirm stability.
- Final Adjustments:
- If any issues are identified during the inspection or load testing, reinforce the connections with additional fasteners or brackets.
- Add more joist hangers or blocking between joists to distribute the load evenly and minimize deflection.
Cleaning Up the Work Area
Properly cleaning up the workspace not only ensures safety but also helps prevent future moisture issues:
- Disposing of Old Wood:
- Remove all old, rotting wood from the crawl space to prevent re-infestation by pests and eliminate sources of mold or mildew.
- Check with local waste management for proper disposal guidelines, as some types of wood may require special handling.
- Clearing Debris:
- Sweep up sawdust, nails, screws, and other debris left from the installation process.
- Consider using a shop vacuum to reach tight corners and remove dust particles that could cause respiratory issues or affect air quality.
- Moisture Management:
- Address any sources of moisture, such as leaking pipes or inadequate drainage, to prevent future joist rot.
- Install or improve vapor barriers, dehumidifiers, and ventilation systems to keep the crawl space dry.
- Regularly inspect the crawl space after heavy rain or seasonal changes to ensure moisture levels remain under control.
By following these guidelines for testing stability and cleaning up the workspace, you can ensure that your newly installed joists will provide reliable, long-term structural support.
FAQs
Contact Trench Guys Today!
Trench Guys will do everything we can to ensure your experience with us is excellent.
Request A FREE Estimate
Request a Free Estimate Form
Checkout Recent Post
Got a Question? We’re Here to Help.
You can arrange an appointment or make an enquiry by phone or email, orget in touch to us via our contact form.


